

Chapter 8: Additional Vocations: Sheet Metal Work
Five short guides in one chapter — sheet metal, plumbing, food, furniture and pottery.
Original notes — ready CBSE (NCERT, English Medium) • Class 9 • Skill Education • Book: Kaushal Vikas
Chapter 8: Additional Vocations: Sheet Metal Work — EG’s own notes, in simple words
Book: Kaushal Vikas (CBSE, Class 9) | Chapter 8 | Unit: Unit II: Work with Machines and Materials | Medium: English
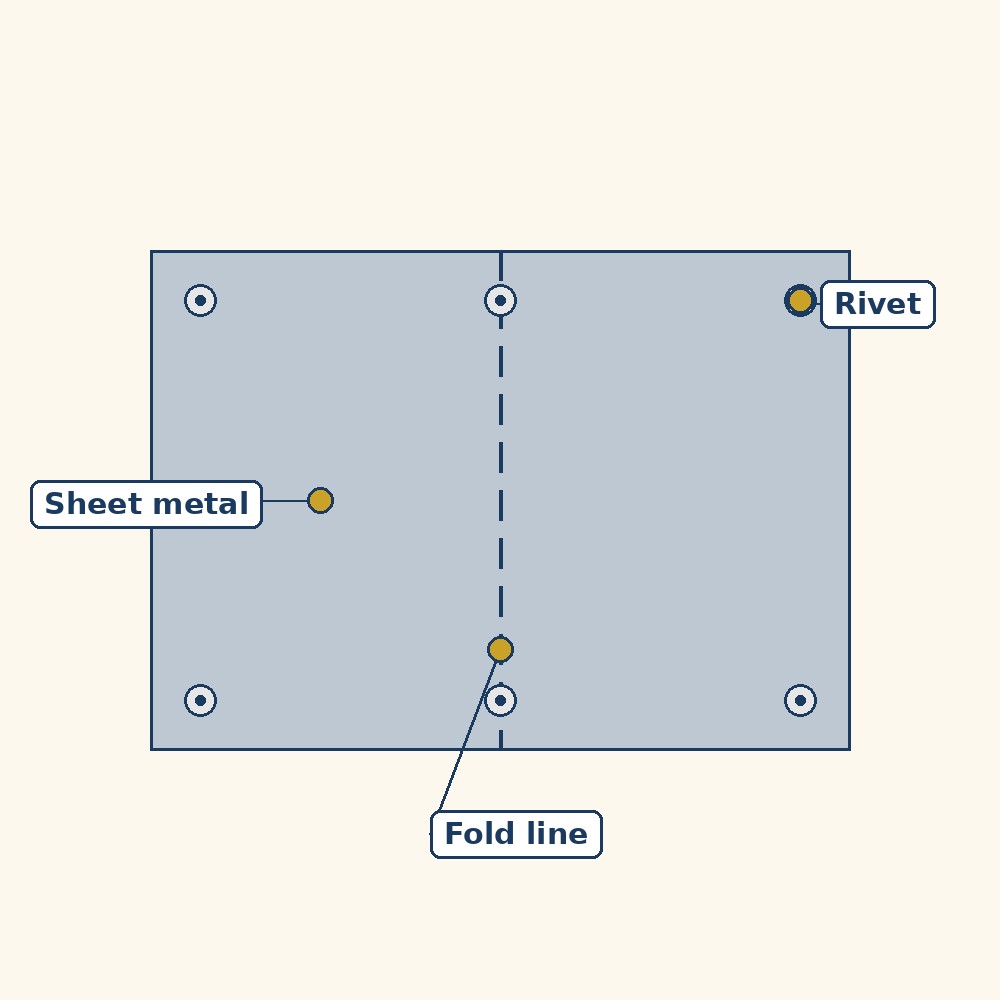
Diagram (labels are printed on the image): A sheet-metal panel: the sheet itself, a rivet joining it, and the fold line it bends along.
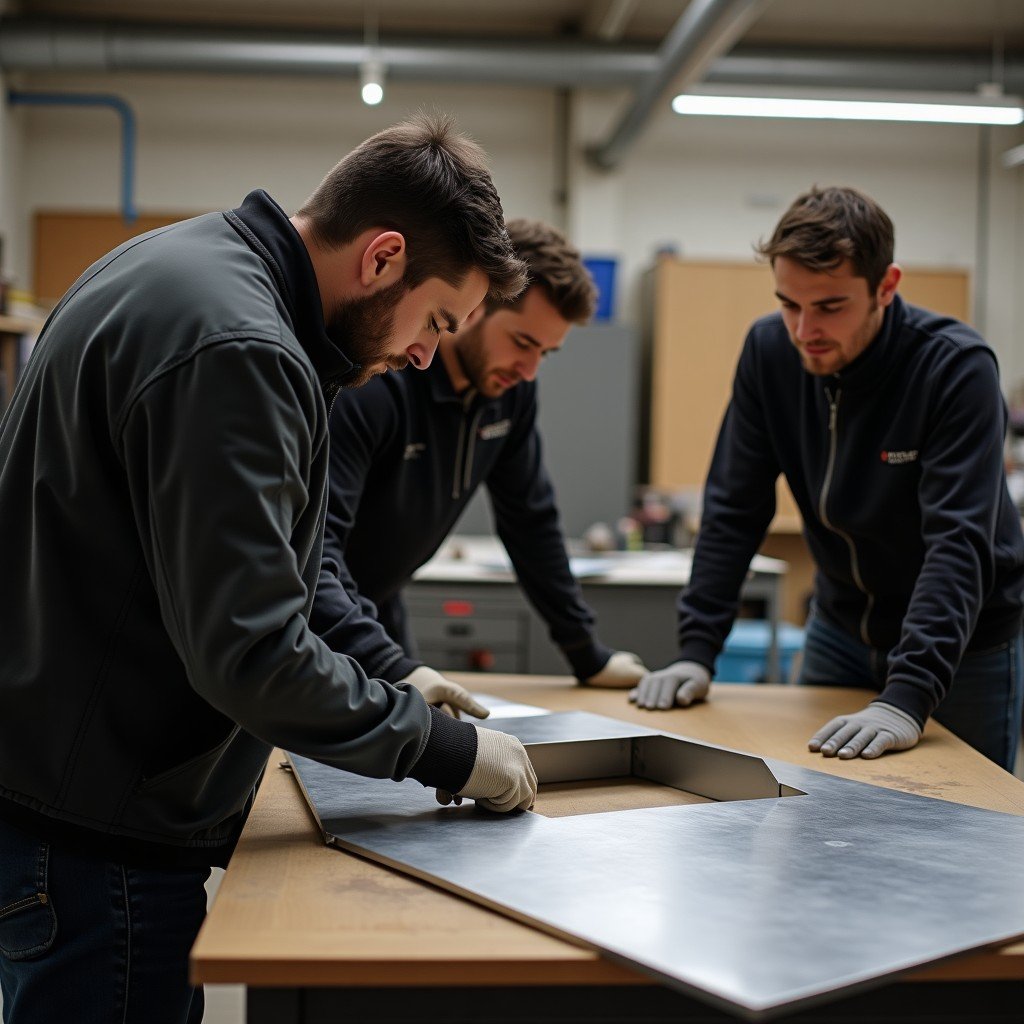
Shaping thin metal sheets in a workshop. A general picture about sheet metal work; it is not a scene from the book.
What the chapter is about
Like Chapter 4, this chapter gives short, practical guides instead of one long project — this time to five additional vocations in Unit II: sheet metal work, plumbing, food processing, furniture making and pottery. Each guide follows the same pattern — keywords, materials, quality parameters, safety parameters and key steps — so you can compare vocations and choose one to explore further. The page keeps the chapter’s honest scale: brief guides, not invented full projects, with the book’s numbers and rules kept exactly.
1. Sheet metal work
Sheet metal work involves shaping thin metal sheets (such as steel, aluminium and copper) into useful products by processes including cutting, bending, forming, joining and finishing. This work requires careful measurement, correct tool selection, safe handling of sharp edges, and attention to quality and finish.
Keywords. Forming (shaping metal without cutting it); burr (a sharp unwanted edge after cutting); rivet (a fastener used to join metal sheets); gauge (the thickness of a sheet). Materials. GI or aluminium sheet (the main material for fabrication); fasteners and rivets; cardboard or paper for the prototype; tin snips or shears for manual cutting; hammer or mallet for shaping and forming; files or grinder for smoothing sharp edges; drill and hand tools for making holes; measuring scale or tape; marking pen or scriber; safety gear — gloves, goggles, apron.
Quality and safety. Accurate dimensions through proper measurement and marking; smooth edges with burrs removed and edges finished; strong joints with secure riveting or joining; proper shape with correct bends and alignment; minimum waste through efficient use of material and reuse of scrap. Wear safety gloves, goggles, ear plugs and apron while working; use cutting and forming tools only as demonstrated; keep fingers away from cutting and bending zones; maintain a clean and organised workspace; dispose of waste as per protocol.
Key steps. (1) Scoping: choose a simple item, such as a dustpan, dustbin, chalk box or box clamps, and decide the quantity to be made. (2) Design and draw: draw simple sketches of the product, mark dimensions and decide the forming technique. (3) Make a prototype: create a prototype using cardboard to test the design, especially folds and joints. (4) Select materials and tools: choose suitable sheet metal and cutting tools (tin shears). (5) Prepare the product: mark on the sheet using a scriber; cut the metal; use punching tools, riveting or folding and hammering, or soldering as required. (6) Finish the product: smooth surfaces, trim edges and apply colours.
2. Plumbing
Plumbing is the work of installing, maintaining and repairing systems that carry water, liquids, gases, fluids or waste through pipes. Plumbing includes planning pipe routes, selecting suitable materials, cutting and joining pipes, fitting taps and valves, checking water flow and repairing leakages.
Keywords. Valve (a device used to control water flow); joint (a connection point between two pipes or fittings); flow (movement of water through a pipe system). Materials. Pipes (PVC, GI or CPVC) for carrying water; pipe fittings — couplings, elbows, tees, end caps; taps and valves for controlling water flow; pipe wrench or spanner for tightening and loosening joints; hacksaw or pipe cutter for cutting pipes to length; thread seal tape or adhesive for preventing leakage at joints; plunger for clearing blocked drains; measuring tape and spirit level for measuring and alignment; cloth and bucket for cleaning and water collection; safety gloves and goggles.
Quality and safety. Leak-free joints with no dripping or seepage from pipes or fittings; proper alignment with pipes laid straight and level; secure fittings with valves and fixtures tightly fixed; smooth water flow with no blockages or air locks; minimum waste of pipes, fittings and water. Wear basic protective equipment such as gloves and safety glasses; keep hands dry while handling tools and fittings; ensure the work area is clean and free of obstacles; dispose of waste as per protocol.
Key steps. (1) Scoping: observe plumbing systems through site visits, videos or interaction with plumbers in homes, schools, farms or the community; choose a simple and safe task, such as fixing a leaking tap, replacing a joint, clearing a blocked drain, or installing a short pipe section. (2) Design and draw: study the water flow path and prepare a simple sketch showing pipes, joints and fixtures. (3) Prepare a detailed plan: a step-by-step plan covering material selection, tool use, safety checks and execution. (4) Select materials and tools for the task and availability. (5) Carry out the work: ensure the water supply is shut off; measure, cut and join pipes; tighten fittings; apply sealing material; fix fixtures carefully. (6) Finish the work: restore the water supply and check for leaks, blockages or improper flow.
3. Food processing
Food processing involves transforming raw food materials into safe, usable and longer-lasting food products through simple activities, such as cleaning, cutting, drying, cooking, fermenting and preserving.
Keywords. Raw material (unprocessed food such as grains, fruits, vegetables or milk); processing (clean, cut, cook, preserve raw material); preservation (methods used to increase the shelf life of food). Materials. Raw food materials; clean water for washing and processing; knives and peelers; chopping board for safe food preparation; bowls and containers; stove or heating source for cooking or roasting (teacher-supervised); drying trays or cloth; weighing scale or cups for measuring quantities; packaging material — jars, pouches, paper labels; cleaning supplies — cloth, soap, waste bins.
Quality and safety. Freshness (raw materials clean and suitable for use); hygiene (processing done in a clean and orderly manner); consistency (uniform texture, taste and appearance); safety (food properly cooked, dried or preserved); minimum waste (efficient use of food, water and materials). Wash hands thoroughly before handling food; keep work surfaces, tools and containers clean; use knives, peelers and heat sources carefully; avoid cross-contamination between raw and processed food; store ingredients and finished products properly; dispose of waste as per protocol.
Key steps. (1) Scoping: choose a simple product, such as roasted grains, dried vegetables, pickle, papad or a snack item. (2) Follow a recipe: list ingredients required, check their quality and freshness, and organise the work area for cleaning, preparation, processing and packaging. (3) Prepare ingredients: wash, peel, cut or sort food materials following hygiene practices. (4) Carry out the work: perform drying, roasting, cooking or fermenting using safe methods; note changes in colour, texture, smell and taste during processing, and take necessary actions. (5) Finish the work: check the product for cleanliness, safety and consistency; pack the food safely using clean containers or pouches; add simple labels if required.
4. Furniture making
Furniture making involves designing and creating useful objects, such as stools, tables, shelves, benches, storage units and simple seating. Furniture making combines practical skills with creativity, while promoting responsible use of materials, reuse of waste wood or metal, and careful workmanship.
Keywords. Joinery (methods used to join two or more parts of furniture); seasoned wood (wood that has been dried to reduce moisture); finishing (final surface treatment such as sanding, polishing or painting). Materials. Wood, bamboo or engineered boards as the main material; metal rods or pipes (optional) for frames or supports; measuring tape or steel rule; try square or spirit level for checking right angles and alignment; hand saw, chisel or plane for cutting and shaping; drill or screwdriver for holes and fixing joints; bench vice or clamps for holding parts securely; hammer or mallet for assembling joints; fasteners (nails, screws, bolts); sandpaper, paint or varnish; waste bins.
Quality and safety. Strength and stability (furniture safely supports its intended load); accuracy (measurements and joints fit properly); finish (surfaces smooth and edges safe); usability (furniture meets the user’s need comfortably); material efficiency (recycling, minimum wastage and reuse of leftovers). Wear basic protective equipment such as gloves and safety glasses when required; keep tools sharp, clean and stored properly after use; keep the workspace clean and free of obstacles; dispose of waste as per protocol.
Key steps. (1) Scoping: choose a simple product, such as a stool, small table, shelf or box. (2) Design and draw: draw a simple sketch with dimensions; decide materials, joints and basic layout; digital tools may be used if available. (3) Prepare a prototype: make a test model using cardboard or paper to check shape, joints and stability. (4) Select materials and tools: choose locally available materials and suitable tools, considering strength, cost and safety. (5) Prepare the product: measure, mark, cut and shape parts carefully; join parts using nails, screws, glue or joints; check alignment and stability. (6) Finish the product: sand surfaces and apply paint, polish or varnish for protection and appearance.
5. Pottery
Pottery involves preparing clay, shaping it using simple techniques, drying it carefully, strengthening it through firing or hardening, and finishing the surface for use or decoration.
Keywords. Wedging (kneading clay to remove air bubbles and ensure even moisture); firing (heating clay in a kiln or open fire to make it hard and durable); slip (clay mixed with water, used for joining parts or surface decoration). Materials. Clay (local) or terracotta as the main material; water for softening clay and making slip; sand or grog for improving strength and reducing cracks; rolling pin or paddles for shaping; wire cutter for cutting clay lumps; carving tools for trimming and decoration; sponges or brushes for smoothing and finishing; moulds for creating uniform shapes; drying boards or trays for safe drying; apron and gloves.
Quality and safety. Material quality (clay clean, well-prepared and suitable for the product); uniform thickness (product walls even and balanced); stability (base flat, product stands firmly); finishing (surface smooth and free from cracks); minimum waste (clay and water reused wherever possible). Use wire cutters and carving tools carefully; keep hands, feet and work surfaces clean to avoid slipping; follow safety instructions during firing or hardening; avoid inhaling clay dust and clean surfaces with wet cloths; wear basic protective gear such as an apron or gloves if required; dispose of waste as per protocol.
Key steps. (1) Scoping: choose a simple item, such as a diya, bowl, cup, tile or planter, and decide the quantity to be made. (2) Design and draw: draw simple sketches, mark dimensions and decide the forming technique. (3) Make a prototype: create a small test piece to observe cracking, drying behaviour and strength. (4) Select materials and tools: select suitable clay; knead and wedge it to remove air and control moisture; procure tools for the chosen process. (5) Prepare the product: use pinch, coil, slab or mould techniques; join parts using slip and maintain even thickness; allow slow and shaded drying; monitor for cracks or warping. (6) Strengthen the product: harden it through kiln firing, open firing or extended sun drying, following safety norms. (7) Finish and decorate: smooth surfaces, trim edges and apply simple textures or natural colours.
Chart / Table: Five vocations at a glance
| Vocation | Core idea | First quality test |
|---|---|---|
| Sheet metal work | Cut, bend, form, join, finish thin sheets | Accurate dimensions; burr-free edges |
| Plumbing | Install and repair pipe systems | Leak-free joints; straight, level alignment |
| Food processing | Clean, cut, dry, cook, ferment, preserve | Freshness, hygiene, consistency, safety |
| Furniture making | Design and build useful objects | Strength, stability, accurate joints |
| Pottery | Prepare, shape, dry, fire, finish clay | Even thickness; flat, stable base |
Key Terms
- Forming — Shaping metal without cutting it.
- Burr — A sharp unwanted edge left after cutting sheet metal.
- Rivet — A fastener used to join metal sheets.
- Gauge — The thickness of a sheet of metal.
- Valve — A device used to control water flow in a pipe system.
- Joint — A connection point between two pipes or fittings.
- Preservation — Methods used to increase the shelf life of food.
- Joinery — Methods used to join two or more parts of furniture.
- Seasoned wood — Wood dried to reduce its moisture content before use.
- Wedging — Kneading clay to remove air bubbles and even out moisture.
- Firing — Heating clay in a kiln or open fire to make it hard and durable.
- Slip — Clay mixed with water, used for joining parts or surface decoration.
Remember
- Sheet metal: measure carefully, prototype in cardboard, file every burr, rivet joints securely.
- Plumbing: shut off supply first; leak-free, straight and level joints; check flow after restoring supply.
- Food processing: hygiene throughout, no cross-contamination between raw and processed food.
- Furniture: seasoned wood, accurate joints, strength tested against the intended load.
- Pottery: wedge out air, keep thickness even, dry slowly in shade, fire only under safety norms.
- All five: prototype first, quality parameters checked, waste disposed as per protocol.
Exam Tip / Common Mistake
Common mistake: listing steps without the safety step that belongs inside them. In plumbing the shut-off belongs before cutting; in sheet metal, gloves and finger clearance belong during cutting and bending; in pottery, firing safety belongs before firing — examiners award the step only where it is done.
- Five brief guides: sheet metal, plumbing, food processing, furniture making and pottery.
- Sheet metal rewards measurement, cardboard prototypes and burr-free, riveted joints.
- Plumbing rewards shut-off first, sealed joints, level alignment and a final flow check.
- Food processing rewards hygiene, consistency and safe storage; furniture rewards seasoned wood and true joints.
- Pottery rewards wedging, even thickness, slow shaded drying and safe firing.
Practice set — try it yourself
- What is a burr, and why must it be removed?
Hint: A sharp edge left by cutting — and what it does to hands. - Why is a cardboard prototype made before cutting sheet metal?
Hint: Folds and joints are cheaper to fix in cardboard. - What is the first thing to do before cutting a pipe for repair?
Hint: It stops the water, not the work. - What is seasoned wood, and why does furniture need it?
Hint: Drying changes what wood does afterwards. - What is slip in pottery, and what is it used for?
Hint: Clay plus water, for joining or decorating.
Questions with Answers
- What is sheet metal work, and what makes a good product?
Shaping thin sheets of steel, aluminium or copper by cutting, bending, forming, joining and finishing. A good product has accurate dimensions, smooth burr-free edges, strong riveted joints, correct bends and alignment, and minimum waste — made with careful measurement, correct tools and full safety gear. - What are the key steps of a plumbing repair?
Scope a simple, safe task (leaking tap, joint replacement, blocked drain, short pipe section); sketch the flow path with pipes, joints and fixtures; plan materials, tools, safety and execution step by step; select materials and tools; shut off the water supply, then measure, cut, join, tighten, seal and fix fixtures; finally restore supply and check for leaks, blockages or improper flow. - How is food processed safely in this chapter?
Choose a simple product (roasted grains, dried vegetables, pickle, papad or a snack); follow a recipe with fresh, checked ingredients and an organised area; wash, peel, cut or sort hygienically; dry, roast, cook or ferment by safe methods while noting colour, texture, smell and taste changes; then check cleanliness, safety and consistency and pack in clean containers or pouches with labels — never mixing raw and processed food. - What makes good furniture, and how is it built?
Strength and stability under its intended load, accurate measurements and joints, smooth and safe finish, comfortable usability, and efficient material use with leftovers reused. Build it by scoping a simple product, sketching with dimensions, testing a cardboard or paper prototype, choosing local materials by strength, cost and safety, then measuring, marking, cutting, shaping, joining and finishing with sanding and paint, polish or varnish. - How is a pottery item made from clay to finished product?
Scope an item (diya, bowl, cup, tile, planter); sketch and choose the forming technique; test a small piece for cracking, drying and strength; knead and wedge the clay to remove air and even moisture; shape by pinch, coil, slab or mould, joining with slip at even thickness; dry slowly in shade while watching cracks and warping; harden by kiln firing, open firing or extended sun drying under safety norms; then smooth, trim and decorate with textures or natural colours.
Extension Questions with Answers
- You must make a small dustpan from sheet metal. Walk through the steps, naming the safety precaution at each cutting or bending step.
Scope the dustpan and quantity; sketch it with dimensions and the forming technique; prototype in cardboard to test folds and joints; select GI or aluminium sheet, tin snips, scriber, files and safety gear; mark with the scriber, cut with snips (gloves, goggles, apron on; fingers clear of the cutting zone), fold and hammer or rivet (fingers clear of bending zones, tools used only as demonstrated); then smooth surfaces, trim burrs and apply colour. - A tap leaks at its joint. Diagnose the fault and the repair sequence.
The joint’s seal or fitting has failed — worn thread seal, loose fitting or damaged washer area. Repair: shut off supply first, dismantle the joint, inspect fitting and seal, replace or re-seal with thread seal tape or adhesive, tighten with a wrench without over-tightening, restore supply, and check for dripping or seepage before declaring it fixed. - During food processing, a student uses the same knife and board for raw vegetables and the finished pickle. What is wrong, and what rule fixes it?
Cross-contamination: microbes from raw material transfer to finished food, breaking the safety parameter. Fix: separate tools and boards for raw and processed food, wash hands and surfaces between stages, and store ingredients and finished products separately in clean, closed containers. - A stool wobbles although its legs look equal. Using the chapter’s quality parameters, what would you check?
Accuracy and joints first: measure leg lengths and joint fit — equal appearance can hide a loose joint or a leg fixed out of square. Check stability under load, surface finish and material: unseasoned wood may have warped after assembly. Tighten or re-glue the failing joint and re-check alignment with a try square and spirit level. - A pottery bowl cracks while drying. What went wrong, and how do you prevent it next time?
Uneven thickness, trapped air, or fast, sunny drying: thick and thin areas shrink differently, air pockets expand, and direct sun dries the outside before the inside. Prevent by wedging thoroughly, keeping walls even, joining with slip, and drying slowly in shade while monitoring for warping — with a small test piece first.
How to use this page: Read the summary, say the Key Terms in your own words, then try the practice set without looking. Use the Questions with Answers to check yourself afterwards. Ask your teacher or parent to check your answers.