

Chapter 7: Apparel
From fibre to finished garment — measure, draft, cut, sew, finish and label, with no wasted cloth.
Original notes — ready CBSE (NCERT, English Medium) • Class 9 • Skill Education • Book: Kaushal Vikas
Chapter 7: Apparel — EG’s own notes, in simple words
Book: Kaushal Vikas (CBSE, Class 9) | Chapter 7 | Unit: Unit II: Work with Machines and Materials | Medium: English
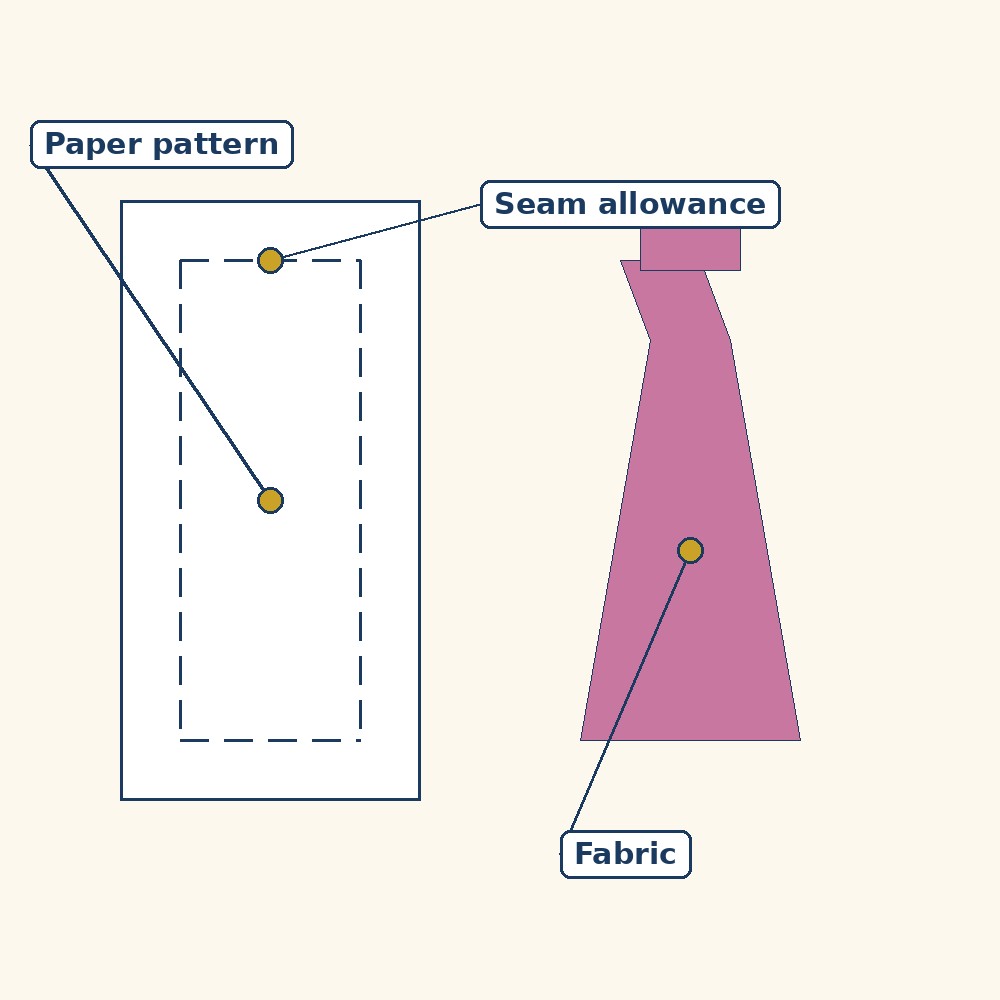
Diagram (labels are printed on the image): Making apparel: the paper pattern, the seam allowance around it, and the fabric it is traced onto.
Stitching a garment. A general picture about apparel making; it is not a scene from the book.
What the chapter is about
Food, shelter and clothing are the basic needs of human beings. From the earliest times, clothing has protected the body from weather and the environment, beginning with animal skins and natural materials for warmth and protection. In India, evidence of clothing can be traced back to the Sindhu–Sarasvati civilisation. Today clothing is much more than protection: what we wear reflects our personality and our culture, and reflects the fashion and trends of the time.
Given this importance, the apparel industry has developed around the design and manufacturing of clothing. It links closely with the textile industry, which produces fibre, yarn and fabric, and with the fashion industry, which specialises in creating unique, branded designs. This chapter is a project: you choose an apparel item, visit experts, draft its pattern, prepare and cut its fabric, sew it, finish it, and pack and label it.
Planning: scoping, process chart and site visit
Scoping. Decide by availability of resources (materials, tools, guiding experts), by what will be created (do you have the resources, and can you complete it in the given time?), and by understanding the need: who will use the apparel, and will it be comfortable, strong and easy to maintain? Upcycling belongs here too: it gives new life to old or unused clothes and fabrics by creatively redesigning them into useful, attractive products — an old pair of jeans transformed into a sling bag with patchwork and mirror work, or fabric scraps stitched together into something new.
Process chart. List tasks with dates and responsibility: selecting fabric based on properties; design and measurement; drafting and pattern making; fabric preparation and cutting; stitching apparel; and finishing, packaging and labelling.
Site visit. Observe and interact with experts — tailor, fashion designer, boutique owner, garment worker — in the presence of a teacher, and take their guidance for planning your work. Record tools and materials and their storage, key processes, safety protocols, schedules, quality criteria and digital tools or apps used.
Technical drawing, materials and tools
Technical drawing of apparel. First visualise how your product will look: what is the design, will it have accessories such as buttons, zips or strings, what fabric will it be made of, and which colour will suit best? Fit requires measurement, and accurate measurement gives the right size and shape. Without a specific person in mind, standard sizes — the sizes used when apparel is produced in bulk — can be learnt from experts or online sources. Measuring a cushion cover is easy (square, rectangle or circle), but apparel measurements must follow the body’s shape, not a flat outline.
Selecting materials. As Chapter 5 taught, materials are selected by properties. For apparel: a T-shirt uses cotton — soft, breathable and comfortable for daily wear; a school uniform uses a polyester-cotton blend — durable, easy to wash and wrinkle-resistant; a dress uses cotton or rayon — soft and comfortable. Besides fabric, you need thread for stitching, preferably of the same colour as the fabric chosen. You may select more than one kind of fabric, for example a different colour or print for a pocket or patchwork.
Selecting tools. Tailoring tape takes measurements (do not pull tightly around the body); scissors cut fabric and thread (avoid handling from the sharp ends); the sewing machine stitches fabric pieces together (operate only under supervision, keep fingers away from the needle); pins hold fabric pieces in place before stitching (insert and remove carefully); the iron presses fabric and seams for neatness (adult supervision; never touch the hot surface); needles stitch cloth with thread (avoid the pointed end); the thimble — a small, hard cap worn on the finger used to push the needle — protects against needle pricks; and trimmings such as lace and sequins may have sharp edges.
Bill of Materials, drafting and fabric preparation
Bill of Materials. Fabric is generally available in rolls, typically 1–1.5 m wide. The length of cloth you need depends on the width of the roll and the material required. Measurements in your drawing alone are not sufficient for estimating cloth: you must add “seam clearance” — extra cloth for stitching and hemming edges. Include the cost of labour and the estimated human hours spent doing the tasks: such “soft” aspects help you understand the value of labour in completing the work. The chapter’s caselet costs a Bill of Materials for a child’s dress on exactly this basis.
Drafting and pattern making. Drafting means marking measurements and drawing the shape on paper. It ensures the right shape and size, avoids mistakes and reduces fabric wastage. Once the draft is cut out, it becomes a paper pattern, which can be reused: the pattern is placed on fabric and traced to get the same shape and size on the fabric each time, making the product accurate and neat with the same measurements every time. To develop a paper pattern, finalise the product design and note down all required measurements — the actual measurements of the product, not reduced or enlarged as per any drawing scale (unlike a technical drawing).
Preparing fabric. After the paper pattern is ready, prepare the fabric before cutting — a crucial step that should not be skipped. Pre-wash (and dry) your fabric before cutting, especially natural fibres like cotton, linen and rayon: pre-washing ensures any shrinkage happens before you cut and sew, not after, when the garment would no longer fit. Press the fabric with an iron to remove wrinkles and creases, since smooth fabric allows accurate marking and cutting. Fold the fabric so that its two side edges, called the selvage, meet.
Marking, cutting, sewing and finishing
Marking and cutting. Place the paper pattern straight along the length of the fabric — this ensures strength and durability — and place it for minimum fabric wastage, for example along the edges. Pin the pattern on the fabric and trace around it with tailor’s chalk, leaving 1–2 cm allowance for seams or hemming. Take feedback from the teacher or expert before cutting. Cut carefully along the marked lines on a flat surface; keep front and back pieces pinned together and labelled to avoid mix-up. Quality tips: make long, smooth cuts rather than many small snips, and keep the scissors parallel to the cutting surface.
Sewing. The key part of sewing is handling the needle and thread. Even when using a sewing machine, some hand stitching is required, so you should be able to use a needle and thread competently: draw a reference line; decide the stitch style in consultation with your teacher or expert (the chapter’s table gives stitches and their uses, including the running stitch); keep stitches straight and even; keep tension consistent across stitches — neither too tight nor too loose; allow no missed or uneven stitches and no damage to the material; and pull the needle away from yourself.
After cutting, secure stitching at both the beginning and the end of every seam: make a few backstitches — stitching backwards over the initial few stitches — so the stitching cannot come loose at these points. Properly secured stitches increase the durability and life of the apparel. Sew at a steady pace so the fabric does not slip or gather in one place, and keep stitches straight, even and properly aligned along the marked lines: uneven stitching affects both appearance and strength.
Finishing. Once stitching is complete, finish the raw edges of the seam allowance inside the garment by trimming or overlocking, to prevent fraying, increase strength and ensure comfort. Neatly hem the bottom, sleeves and neck of the apparel — important for durability and a neat appearance, since unfinished edges, especially on woven fabrics, fray with washing and wear. The chapter shows simple hemming methods: close hemming, vertical hemming and hand rolled hemming.
Packaging and labelling. After finishing and checking, pack the apparel neatly for delivery, storage or display. Packing is not just wrapping: it protects from dust, dirt and damage and presents the product professionally to the customer. Labelling is equally important: it displays the brand name and informs the customer of the size and how to keep the apparel looking fresh. The label is the primary means of communication between manufacturer and customer, and it also helps the seller guide the customer. The chapter shows frequently used label symbols and an example label.
Key Terms
- Apparel — Clothing designed and manufactured for wear.
- Textile industry — The industry producing fibre, yarn and fabric.
- Selvage — The side edge of a fabric length; the two selvages are brought together when folding fabric.
- Drafting — Marking measurements and drawing an apparel shape on paper.
- Paper pattern — A cut-out draft, reusable for tracing the same shape and size onto fabric.
- Seam allowance / seam clearance — Extra cloth (1–2 cm) left beyond the pattern line for stitching and hemming.
- Backstitch — Stitching backwards over the first few stitches to secure a seam’s beginning and end.
- Hemming — Neatly folding and stitching an edge (bottom, sleeves, neck); methods include close, vertical and hand rolled hemming.
- Overlocking — Finishing raw seam edges to prevent fraying.
- Upcycling — Creatively redesigning old or unused clothes and fabrics into useful, attractive products.
- Sustainable fashion — Fashion that reduces waste and environmental harm, for example by reusing and upcycling clothes.
Remember
- Clothing is a basic need, and apparel links the textile industry (fibre, yarn, fabric) with fashion (design).
- Choose fabric by properties: cotton for soft daily wear, polyester-cotton for durable uniforms, cotton or rayon for dresses.
- Draft at actual size; a paper pattern gives the same shape and size every time and reduces wastage.
- Pre-wash and press before cutting — shrinkage and wrinkles must be dealt with before, not after.
- Leave 1–2 cm seam allowance; cut long and smooth; label front and back pieces.
- Backstitch seam ends, sew steadily, and finish raw edges so garments survive washing.
Exam Tip / Common Mistake
Common mistake: measuring over thick winter clothes and cutting to those numbers. The garment then fits the coat, not the person. Measure over light clothing, or re-measure without the bulk — and state the correction, not just the error.
- Apparel serves a basic need and joins textiles (fibre, yarn, fabric) with fashion design.
- Plan by scope, process chart and site visit; choose fabric by properties, not by colour alone.
- Draft a reusable paper pattern at actual size, then pre-wash, dry and press the fabric.
- Mark with 1–2 cm seam allowance, cut long and smooth, and backstitch every seam’s ends.
- Finish by trimming or overlocking, hemming, checking quality, then packing and labelling.
Practice set — try it yourself
- Why is a paper pattern better than measuring fresh for every garment?
Hint: Same shape, same size, every time — and less waste. - What is seam allowance, and how much is left?
Hint: 1–2 cm beyond the pattern line. - Why pre-wash cotton before cutting?
Hint: Shrinkage must happen before sewing, not after. - What is a backstitch, and where is it used?
Hint: Backwards over the first stitches, at both seam ends. - Name three hemming methods from the chapter.
Hint: Close, vertical and hand rolled.
Questions with Answers
- Why is clothing more than protection, and what industries does apparel link?
Clothing began as protection from weather and environment, using animal skins and natural materials, with Indian evidence back to the Sindhu–Sarasvati civilisation. Today it also reflects personality, culture and fashion trends. Apparel therefore links the textile industry (fibre, yarn and fabric production) with the fashion industry (unique, branded design). - How do you select fabric for a T-shirt, a school uniform and a dress?
By properties: cotton for a T-shirt (soft, breathable, comfortable for daily wear); a polyester-cotton blend for a school uniform (durable, easy to wash, wrinkle-resistant); cotton or rayon for a dress (soft and comfortable). Thread should preferably match the fabric’s colour. - What is drafting, and why is a paper pattern useful?
Drafting is marking measurements and drawing the apparel shape on paper. The cut-out draft becomes a paper pattern that can be reused: placed on fabric and traced, it gives the same shape and size every time, ensuring accuracy and neatness and reducing fabric wastage. Pattern measurements are actual measurements, not drawing-scale reductions. - Why must fabric be pre-washed and pressed before cutting?
Pre-washing (and drying), especially for natural fibres like cotton, linen and rayon, makes shrinkage happen before cutting and sewing, so the finished garment keeps its fit. Pressing removes wrinkles and creases, so marking and cutting are accurate. Skipping either step risks a garment that shrinks or is cut crooked. - How are garments sewn, finished, packed and labelled?
Mark with 1–2 cm seam allowance, cut long and smooth on a flat surface, keep pieces pinned and labelled, and sew steadily with straight, even stitches, backstitching both seam ends so they cannot open. Finish raw seam edges by trimming or overlocking, hem bottom, sleeves and neck, then check quality, pack neatly against dust and damage, and label with brand, size and care information.
Extension Questions with Answers
- You must stitch a pajama set for daily use from cotton, polyester or a cotton-polyester blend. Which fabric, and why?
A cotton-polyester blend balances the choice: cotton gives softness and breathability for daily comfort, polyester adds durability and wrinkle resistance for frequent washing. Pure cotton is comfortable but wrinkles and wears faster; pure polyester is durable but less breathable for all-day wear. - A learner measures an apron and a dress while the person wears thick winter clothes. What goes wrong, and how do you correct it?
Measurements come out too large, so both garments fit loosely and wrongly once winter clothes are removed. Correct by re-measuring over light, close-fitting clothing (or without the bulk), and checking each measurement against standard sizes before cutting. - How does a paper pattern reduce fabric wastage?
It fixes the shape before cloth is touched, so pieces can be laid out for minimum waste along edges and length, traced identically each time, and checked by the teacher before cutting. Without it, every garment is measured and marked afresh on cloth, where mistakes cost fabric instead of paper. - A student’s stitching is uneven in length and loose. What problems follow in use and washing, and how are they corrected?
Loose, uneven stitches pucker the seam, weaken it and let it open in use and washing, spoiling appearance and fit. Correct by re-stitching with even length and consistent tension — neither too tight nor too loose — and backstitching both ends, after checking that the machine is threaded correctly and the pace is steady. - Write down ten things you can do with an old dress, and explain sustainable fashion.
Reuse ideas include a sling bag, cushion covers, patchwork quilts, cleaning cloths, hair bands, doll clothes, tote bags, table runners, gift wraps and plant pot covers — upcycling in the chapter’s sense. Sustainable fashion means choosing, reusing, repairing and upcycling clothes so fewer resources are consumed and less textile waste is created, instead of discarding wearable fabric.
How to use this page: Read the summary, say the Key Terms in your own words, then try the practice set without looking. Use the Questions with Answers to check yourself afterwards. Ask your teacher or parent to check your answers.