

Chapter 6: Construction
Build it straight, level and strong — drawing, foundation, brickwork, curing and finish, in order.
Original notes — ready CBSE (NCERT, English Medium) • Class 9 • Skill Education • Book: Kaushal Vikas
Chapter 6: Construction — EG’s own notes, in simple words
Book: Kaushal Vikas (CBSE, Class 9) | Chapter 6 | Unit: Unit II: Work with Machines and Materials | Medium: English
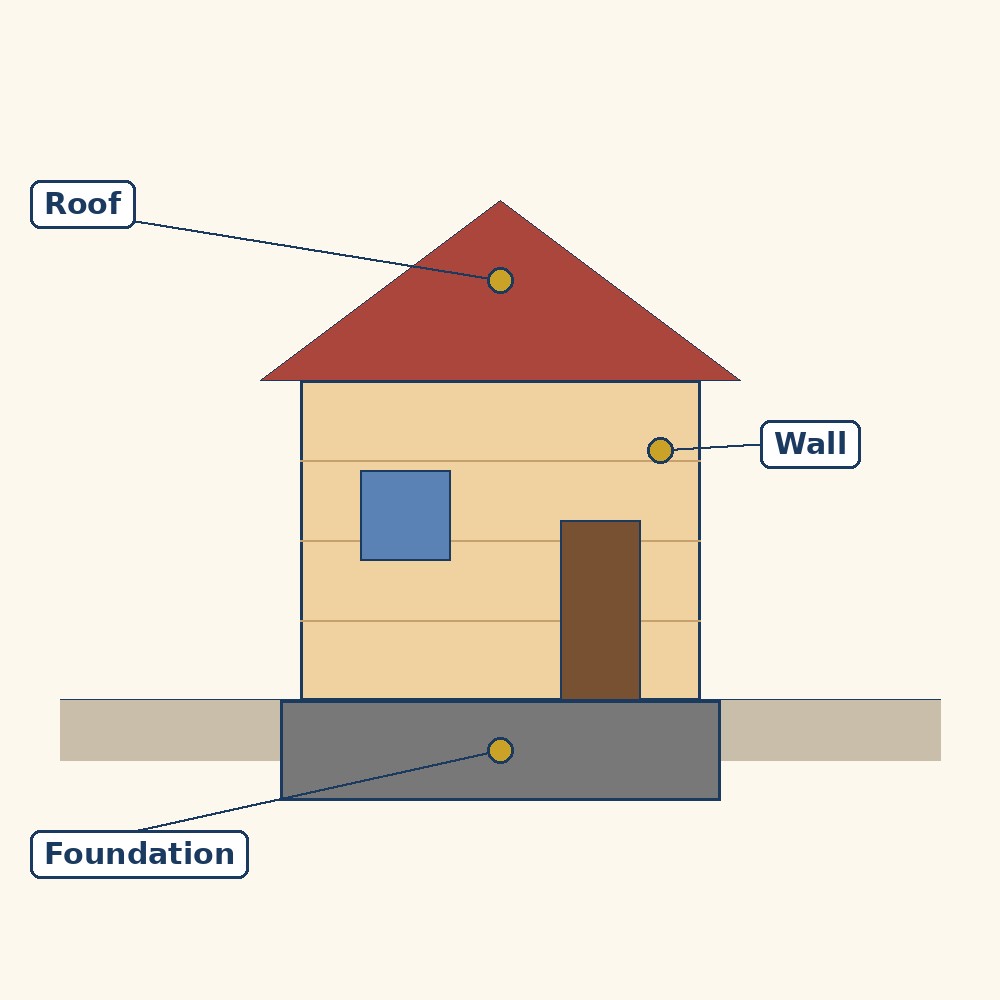
Diagram (labels are printed on the image): A small house structure: its roof, its wall, and its foundation below the ground line.

Workers building a small structure. A general picture about construction; it is not a scene from the book.
What the chapter is about
Construction simply means the process of building structures that people use in their daily lives. It enables us to live safely, travel and work comfortably, and protect ourselves from heat, rain and other weather conditions. Since the beginning of human life, people have always needed a safe place to live: early humans took shelter in caves, then, as they settled and grew food, made simple homes from mud, grass, wood and stones. Slowly, as basic construction principles evolved, people learnt to use bricks, cement, iron and steel, which helped them build stronger and longer-lasting houses. As villages turned into towns and towns into cities, the need for more houses and better facilities increased, and with little open space in cities, people started constructing multi-storey buildings.
This chapter is a project: you scope a small structure, visit a construction site, draw it, cost it, practise minor repair, build it, and finish it — learning at each step why order and alignment matter more than speed.
Planning: scoping, process chart and site visit
Scoping. Decide what will be constructed, based on the need of the school or community: a boundary wall, a shed, a ramp, a pavement or a wash basin. The chapter’s examples include a ramp, fence, flower bed, tree guard, handwash stand, bench, stand for pots and curved flower bed. Check material and resource availability — bricks, sand, cement, gravel, water or recycled materials — their cost, and whether they can be safely managed and handled. Also decide what the structure is for and who will use it.
Process chart. Once you identify the structure and where to build it, list the key tasks with estimated dates: preparing the construction drawing; marking the drawing on the field (line out); preparation of foundation; brick work; curing (the process that strengthens the construction); plastering; and finishing and painting. Sequencing is not paperwork: foundation must precede brickwork, and curing must follow it, or the structure never gains its strength.
Site visit. Visit a construction site in the surrounding area with a teacher and speak to practitioners — a mason, civil contractor, civil engineer, architect or anyone involved in actual design and construction. Ask about processes, tools and materials, and take their guidance for planning your work. Record tools and materials and their storage, key processes, safety protocols, schedules, quality criteria and technology use: robots now do tasks like brick-laying and demolition, and laser scanners detect faults in buildings.
Technical drawing, materials and tools
Technical drawing. The person designing the construction (for example, an architect) is often different from the person doing the work (for example, a civil engineer and mason), so technical drawings communicate the exact details of the work to be done. Draw the side view, plan and elevation of your structure, following Chapter 5’s Section 5.4.3. In the chapter’s caselet, students building a ramp defined a scale and drew its elevation and side view: actual size 10 m drawn as 10 cm means a scale of 1:100 — 1 unit on paper to 100 units on the field, or 1 cm on paper = 100 cm on the field — written as 1:XX, where XX is the field units per paper unit.
Materials. Bricks build walls and partitions — stack them properly to avoid injury and handle gently, since they break or hurt if thrown around. Cement binds bricks, sand and stones together — avoid direct contact with skin and eyes, use gloves, and store it in a dry place (cement left exposed through a rainy season absorbs moisture and spoils). Sand mixes with cement to make mortar and concrete — wear a mask against dry-sand dust. Gravel mixes with cement and sand to make concrete — lift sacks carefully to avoid back strain. Mortar is sand, cement and water; concrete adds gravel.
Tools. Trowel, karni or thappa for lifting, spreading and smoothening cement or mortar (hold firmly by the handle, avoid sharp edges, clean after use); hoe for loosening soil and mixing sand and cement (proper grip, safe distance from others); wooden float for smoothening plastered walls and floors (dry hands for grip); metre tape for measuring length; and the three alignment tools — plumb bob, spirit level and water level tube (see below). Many technology and AI-based tools also exist, from brick-laying robots to laser fault scanners.
Bill of Materials: bricks, mortar and labour
Estimating bricks. Bricks of different sizes and materials are available — clay bricks, fly ash bricks and concrete bricks. In India, the standard size of a brick is 190 × 90 × 90 mm, but with 10 mm of mortar joining bricks, you must count each brick as 200 × 100 × 100 mm. Estimation uses volume: compare the total space of the structure with the space taken by a single brick — the structure’s “capacity” to contain bricks.
Estimating mortar. Mortar must use good-quality sand, free of impurities like clay and dust. Recommended cement-to-sand ratios depend on the work: brick masonry 1:3, RCC 1:2, and general repair and maintenance 1:3 to 1:6. By rule of thumb, laying 100 standard bricks uses approximately 5–10 kg of cement at a 1:4 or 1:5 ratio. Plastering ratios differ again: 1:6 for external plastering and 1:4 for interior plastering.
| Use of mortar | Cement : sand |
|---|---|
| Brick masonry | 1:3 |
| RCC | 1:2 |
| General repair and maintenance | 1:3 to 1:6 |
| External plastering | 1:6 |
| Interior plastering | 1:4 |
The full Bill of Materials. The BoM estimates costs in advance and avoids waste by ensuring only what is necessary is bought, and it must include labour cost — estimated time × hourly rate × number of people. In the chapter’s ramp caselet: 1200 bricks × ₹10 = ₹12,000; cement 50 kg = ₹400; sand 0.3 m³ (~500 kg) = ₹500; water 100 L = free; labour (foundation, marking, mixing, brick laying, and curing at 10 minutes a day for 28 days ≈ 4.6 hours, each at ₹50 for 2 people) = ₹830 — total ₹13,730.
Minor repair, curing and bonds
Minor repair. Before the main construction, practise mortar work on minor repairs — broken tiles, damaged walls, broken ramps, fencing, tree guards, small walls. Mix one part cement and three parts sand, add water slowly to a smooth, thick paste, clean the surface and lightly sprinkle water on it, then apply mortar on cracks, joints, tiles or uneven surfaces with a trowel; press, level and smoothen.
Curing. After applying mortar, keep it wet for 14–28 days. Curing completes the chemical reaction between water and mortar that bonds materials together; bonding grows stronger with curing, and the process generally takes 28 days to complete. If curing stops too early, the structure becomes weak and cracks may appear, reducing strength. For minor repairs, leave the mortar to set for 24 hours, then sprinkle water lightly for 14–28 days; on sloped surfaces where water runs off, place wet jute or gunny bags over the surface.
Brick bonds. Different patterns of laying bricks with mortar make the structure strong and stable. Stretcher bond: the length of the brick faces front — used for boundary walls and partitions of half-brick thickness. Header bond: the width faces front — used for thick walls and curved walls. English bond: alternate rows of stretcher and header — among the strongest bonds, mainly used for load-bearing structures. Flemish bond: alternate stretcher and header in each row.
Building the structure, alignment and finishing
Preparation. Clean the site: remove grass and loose soil, sprinkle water to settle dust. Mark the boundary with a metre tape and a pointed stick. Make the foundation: for simple construction a deep foundation is not necessary since the load is not high, but the ground must be flat and the soil firm — check flatness with a spirit level and water level tube, remove extra soil, spray water and let it dry so the soil firms up.
Laying bricks. Soak bricks in water for a minimum of 6–12 hours: dry bricks absorb water from the mortar and weaken it. Lay bricks in the selected bond pattern, applying mortar between them. For structures that are not perfect rectangles or squares — a ramp, for example — cut bricks to the required shape and size so they fit properly, keeping structural strength and a smooth finish, with no gaps or protruding edges.
Ensuring alignment. Structures are designed to push load straight down into the ground. If a structure is not perpendicular and parallel to the ground, or two points in it are not at the same height, gravity acts to weaken it. Three tools prevent this: the plumb bob (ensures the structure is perpendicular to the ground), the spirit level (ensures it is parallel to the ground), and the water level tube (ensures two points at a distance are at the same height). Skipping the plumb bob and trusting the eye is a specific technical risk: even a slightly out-of-plumb wall carries its load off-line, and over years that eccentricity weakens and can crack the building.
Plastering and finishing. Plastering applies a smooth or textured coating to a wall, increasing durability, protecting from moisture and heat, and making the structure neat and attractive. Prepare the surface with a wire brush and light dampening; never make plaster paste in large quantities; mix cement and fine sand at 1:6 for external and 1:4 for interior work, adding water slowly. After plastering and curing, painting gives professional finishing: it makes walls neat and attractive, prevents leakages, increases the life of the construction and helps pest control. Whitewash (lime wash) suits houses, temporary structures, ceilings and low-cost housing — very cheap, antibacterial, heat-reflecting and eco-friendly — and other paints are chosen by budget and purpose from a hardware shop.
Key Terms
- Construction — The process of building structures people use in daily life.
- Load-bearing construction — Construction where walls themselves carry the building’s load (contrast RCC, where a reinforced frame carries it).
- RCC — Reinforced Cement Concrete: concrete strengthened with steel reinforcement.
- Foundation — The prepared base that transfers a structure’s load into the ground.
- Mortar — A mixture of sand, cement and water that bonds bricks and plasters walls.
- Concrete — Sand, cement, gravel and water mixed to a strong, stone-like material.
- Curing — Keeping mortar wet for 14–28 days so its bonding chemical reaction completes.
- Plumb bob — A hanging weight that shows whether a structure is perfectly vertical.
- Spirit level — A tool whose centred bubble shows a surface is level (parallel to the ground).
- Water level tube — A water-filled tube showing whether two distant points are at the same height.
- Brick bond — The pattern of laying bricks: stretcher, header, English or Flemish.
- Plastering — Applying a smooth or textured coating to a wall for durability and appearance.
Remember
- Order is structural: drawing → line out → foundation → brickwork → curing → plastering → finishing.
- Standard brick 190 × 90 × 90 mm counts as 200 × 100 × 100 mm with its 10 mm mortar joint.
- Mortar ratios: brickwork 1:3, RCC 1:2, repair 1:3–1:6, external plaster 1:6, internal plaster 1:4.
- Soak bricks 6–12 hours; cure mortar 14–28 days (28 to complete); minor repairs set 24 hours first.
- Alignment trio: plumb bob for vertical, spirit level for level, water level tube for equal heights.
- Bonds: stretcher for partitions, header for thick and curved walls, English for load-bearing strength.
Exam Tip / Common Mistake
Common mistake: quoting the brick size without the mortar joint, or the plaster ratio without saying internal or external. Examiners ask for the working number — 200 × 100 × 100 mm, 1:6 outside, 1:4 inside — so always give the number with its condition.
- Construction builds the structures of daily life, from mud homes to multi-storey cities.
- Plan in order: drawing, line out, foundation, brickwork, curing, plastering, finishing.
- Cost honestly: standard brick counts with mortar (200 × 100 × 100 mm), mortar by ratio, labour by hours.
- Cure 14–28 days; never stop early, and never lay dry bricks — soak them 6–12 hours.
- Keep load straight down: plumb bob, spirit level and water level tube on every structure.
Practice set — try it yourself
- Why does a brick count as 200 × 100 × 100 mm when its size is 190 × 90 × 90 mm?
Hint: The joint between bricks has a thickness too. - Give the mortar ratios for brick masonry, RCC and external plastering.
Hint: 1:3, 1:2 and 1:6 — in that order. - What does each alignment tool check?
Hint: Vertical, level, equal heights — three tools, three jobs. - Why soak bricks before laying them?
Hint: Dry bricks steal something from the mortar. - What happens if curing stops after only a few days?
Hint: The bonding reaction never completes.
Questions with Answers
- What is construction, and how has it changed over time?
The process of building structures for daily life — shelter, travel and work, protected from heat, rain and weather. Humans moved from caves to mud, grass, wood and stone homes, then to bricks, cement, iron and steel for stronger, longer-lasting houses, and finally to multi-storey buildings as villages became towns and cities with little open space. - What are the major steps of a small construction project, and why does their order matter?
Construction drawing; marking on the field (line out); foundation; brickwork; curing; plastering; finishing and painting. Order matters physically: brickwork needs a foundation, and curing must follow brickwork to complete the mortar’s bonding — reversing steps leaves a structure that looks built but never gains strength. - How do you estimate bricks and mortar for a structure?
By volume: a standard brick is 190 × 90 × 90 mm but counts as 200 × 100 × 100 mm with its 10 mm mortar joint, and the structure’s volume divided by the brick’s volume gives the count. Mortar follows ratios by use — brick masonry 1:3, RCC 1:2, repair 1:3–1:6, external plaster 1:6, internal plaster 1:4 — with roughly 5–10 kg of cement per 100 bricks at 1:4 or 1:5. - What is curing, and why does it take 14–28 days?
Keeping applied mortar wet so the chemical reaction between water and mortar completes and bonds materials together. Bonding strengthens with curing and generally needs 28 days to complete; stopping early leaves the structure weak and liable to crack. Minor repairs set for 24 hours first, then receive light sprinkling for 14–28 days. - Compare the four brick bonds.
Stretcher: length faces front, for boundary walls and half-brick partitions. Header: width faces front, for thick and curved walls. English: alternate rows of stretcher and header, among the strongest, mainly for load-bearing structures. Flemish: alternate stretcher and header within each row.
Extension Questions with Answers
- Identify a structure near your school and name its visible structural elements and their functions.
Take a classroom block: the foundation (hidden, but its plinth shows) carries load into the ground; walls enclose space and, in load-bearing construction, carry the roof; the roof shelters from weather; beams and columns, where visible, carry and transfer loads to the foundation. Each element’s job is load transfer, enclosure or shelter — never decoration alone. - Is your house or school load-bearing or RCC construction? Give reasons for that choice.
Most single-storey or low buildings can be load-bearing: walls carry the load, materials are simple and costs lower. Taller or larger buildings need RCC: a reinforced frame carries heavier loads across longer spans and more storeys than masonry walls safely can. The choice follows height, span, load and cost — not fashion. - You must build a small boundary wall. List your process-chart steps and explain why sequencing matters.
Drawing, line out, foundation, brickwork (stretcher bond suits a partition wall), curing, plastering, finishing. Sequencing matters because each step needs the last one complete: bricks cannot be laid true without a marked, level foundation, and plaster cannot protect uncured brickwork — a skipped step reappears later as cracks or collapse. - Name three construction-site safety rules and explain the accident each prevents.
Stack bricks properly (falling stacks injure feet and hands); wear gloves and eye protection with cement (cement burns skin and eyes); keep a safe distance while others use hoes or cutting tools (swinging tools strike bystanders). Each rule maps to one real injury, which is why experts insist on them before work starts. - Cement was left exposed through the rainy season for months. What happened to it, and why? And why would a government ban construction in a drought summer?
The cement absorbed moisture and set into lumps, becoming useless as a binder — which is why cement must be stored dry. In a drought summer, construction is banned because it consumes large quantities of water (mixing, curing, cleaning) that drinking and farming need more urgently; the ban protects the scarcer, more vital use.
How to use this page: Read the summary, say the Key Terms in your own words, then try the practice set without looking. Use the Questions with Answers to check yourself afterwards. Ask your teacher or parent to check your answers.